A write-up following Heath Adams' tutorial for setting up a vulnerable Domain Controller with Active Directory services. Included in this write-up is how to configure Windows Server 2019, Active Directory Domain Services, Active Directory Certificate Services, Group Policy Objects, adding/managing Users, Groups, and Computers, and how to connect other Windows 10 Enterprise systems to the domain.
After creating the virtual machine for Windows Server 2019, boot it up and begin the installation process. Create your disk partitions, create your Administrator password, and install your VMware tools if using VMware. Make sure you rename the server before rebooting. In my lab, I named my server RYAN-DC.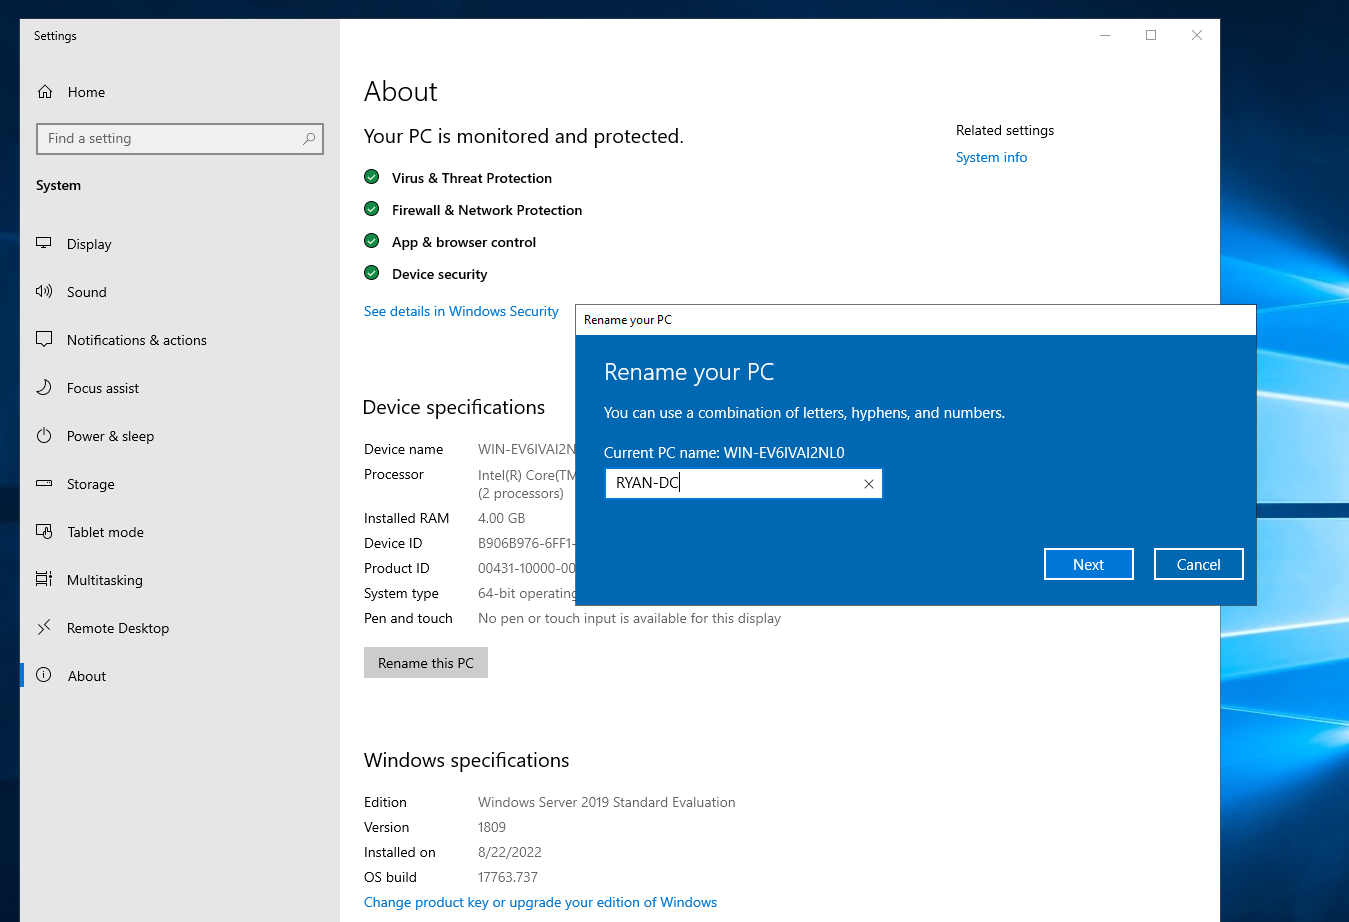
Once the PC reboots and you're back inside of Server Manager, we're going to install Active Directory Domain Services. In the top right corner, click on Manaage > Add Roles & Features > select Role-Based > under Server Selection click next > check the box Active Directory Domain Services > Click Add Features and then click next > under Features click next > under AD DS click next > under Confirmation click install.
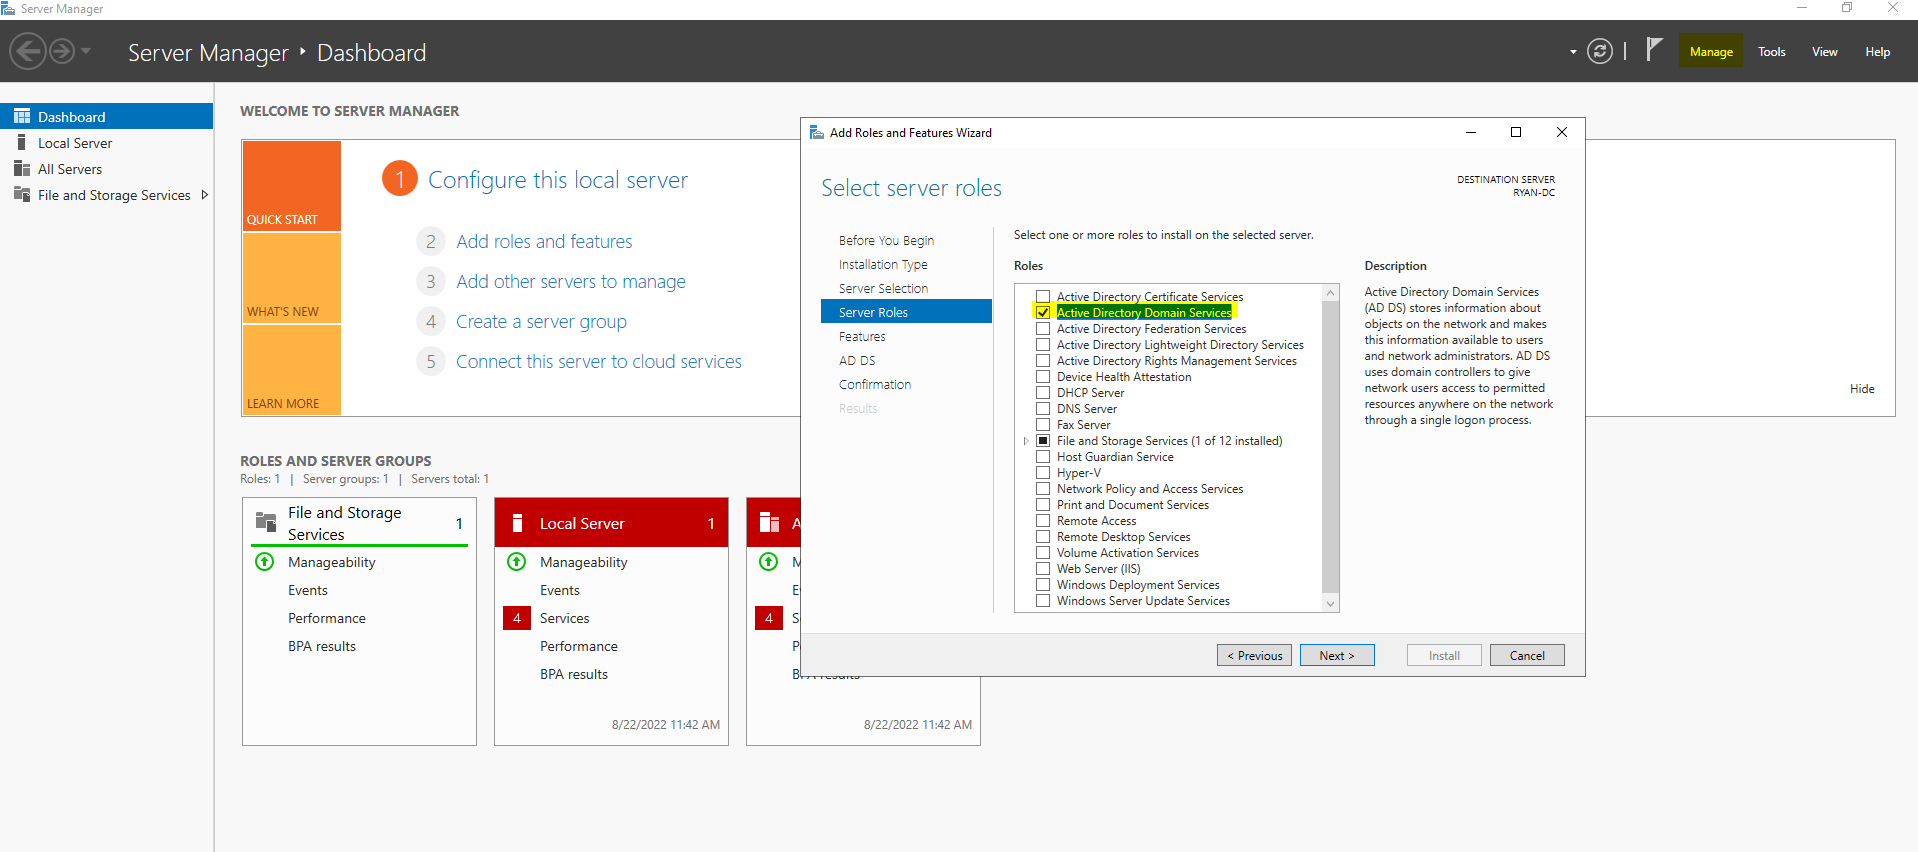
Once the installation is complete, hit the close button. In the top right, you should see the flag notification. Click it and click on the blue link to promote to a domain controller.
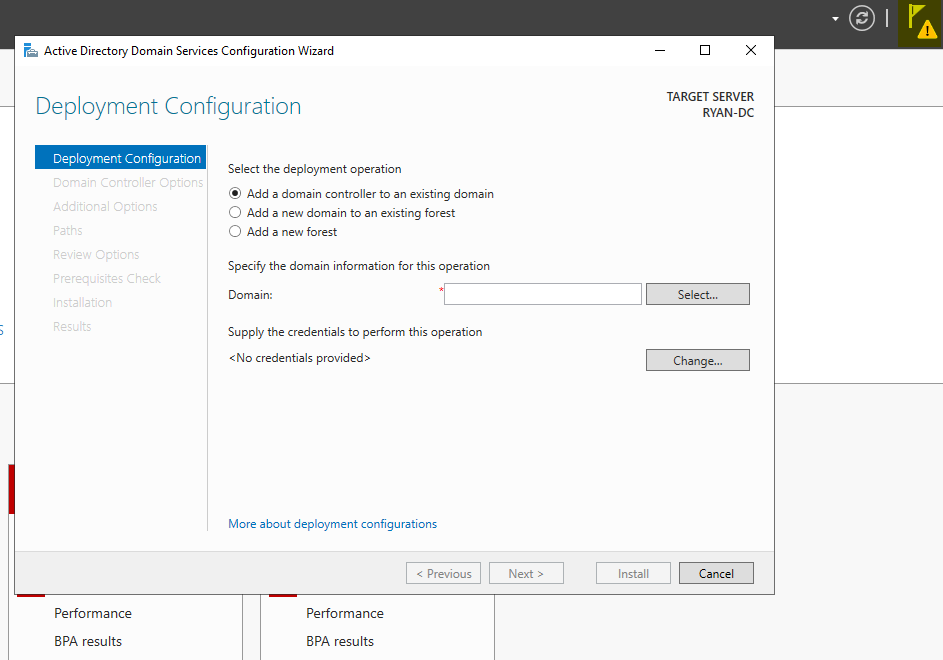
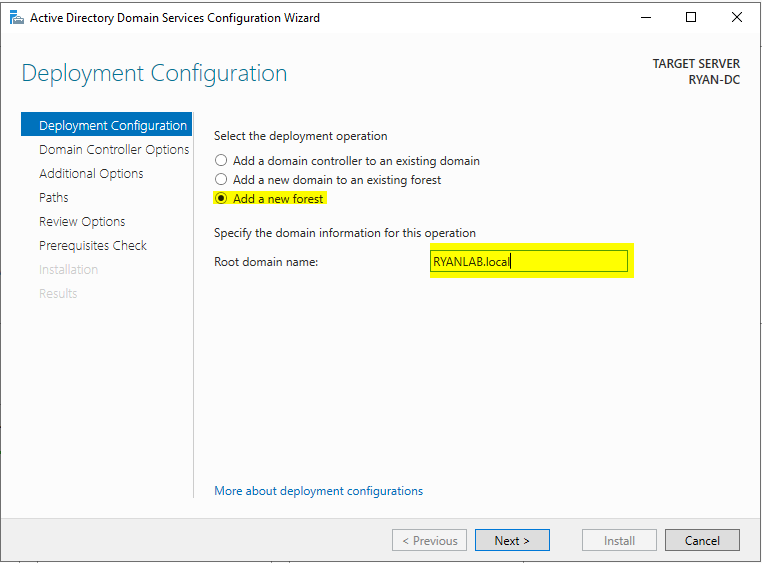
Now we're going to go through this process of promoting this server to a domain controller. Select "Add a new forest" and type a root domain name in. This could be anything you want. For my lab, I named this "RYANLAB.local", then click next > set a DSRM password and click next > under DNS Options click next > under Additional Options wait for the NetBIOS name to populate and click next > under Paths click next > under Review Options click next > under Prerequisite Check click install and wait for the reboot.
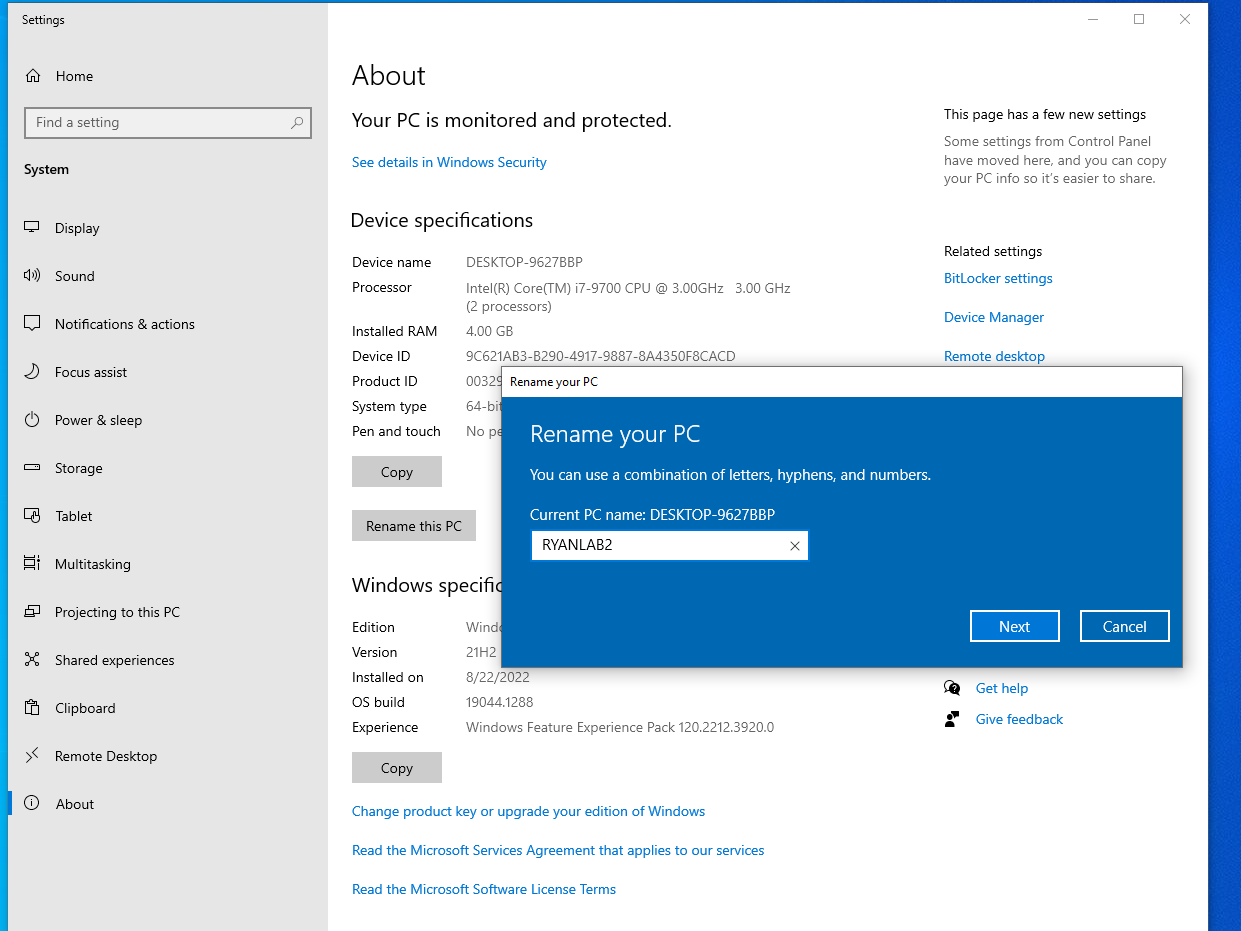
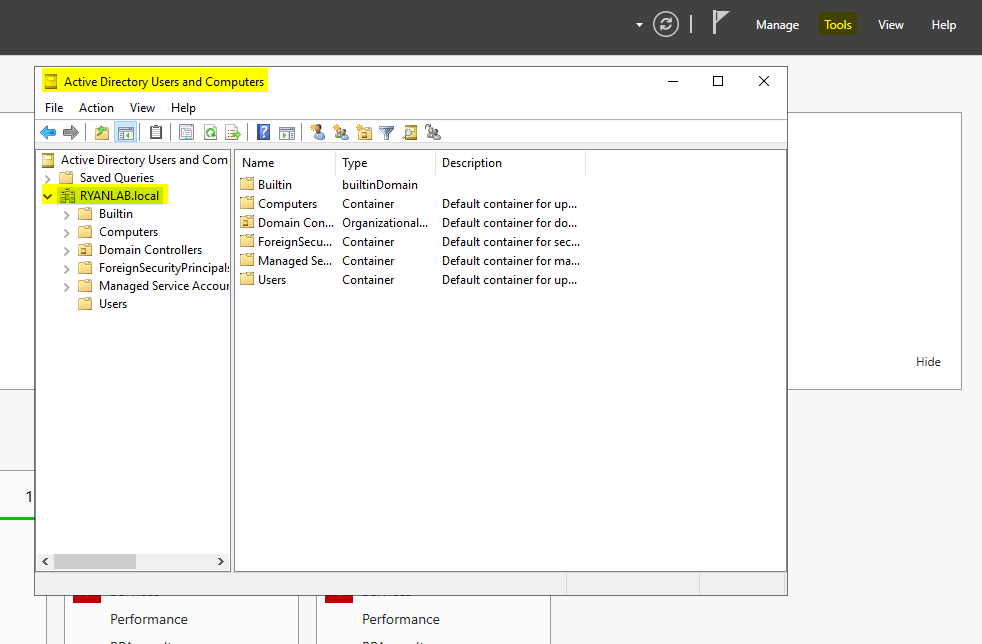
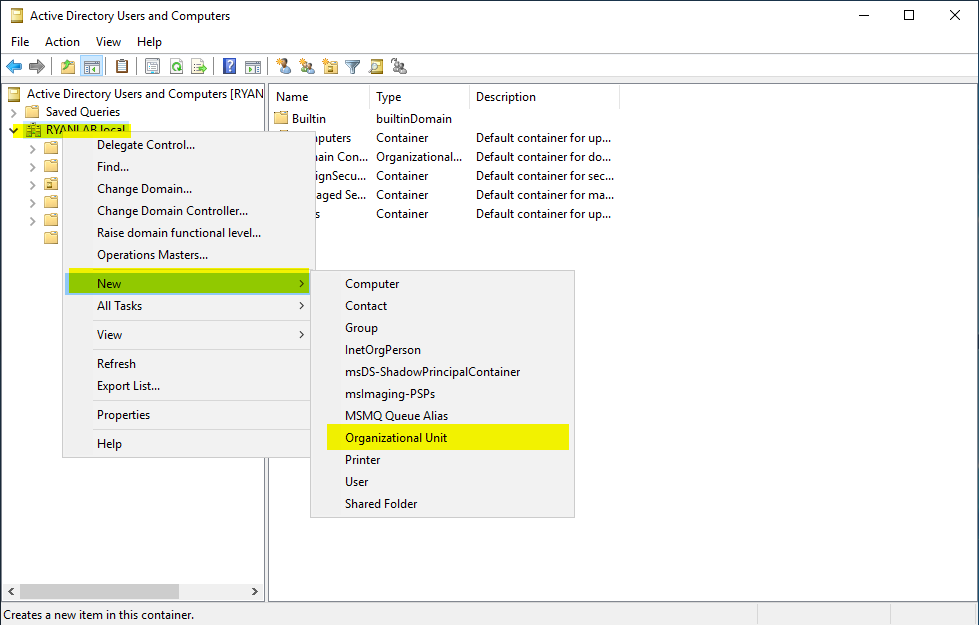
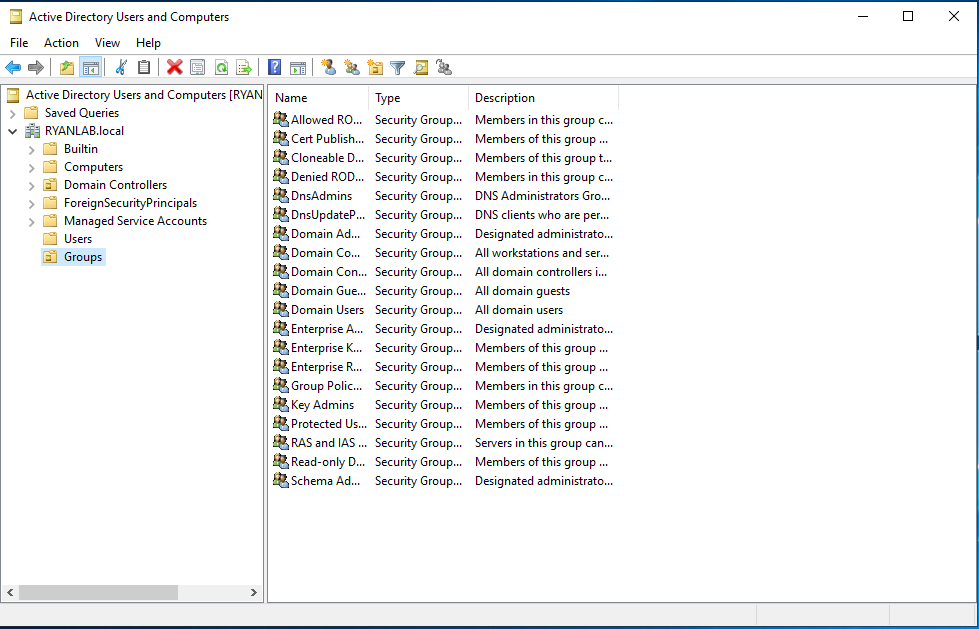
You can right click the dropdown on your domain to see all of the current Organizational Units (OUs). In here, you can see that we have some built-in security groups under the Users OU. Let's create a new OU called Groups and move all of these default security groups into that OU. You can select them all and drag-and-drop into the new Groups OU or you could right click and select Move.
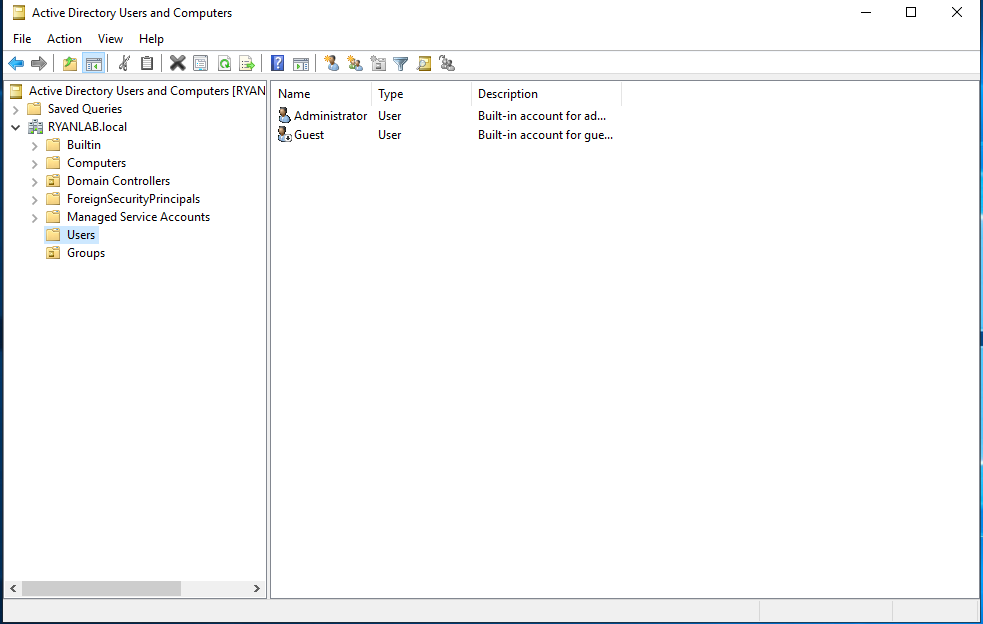
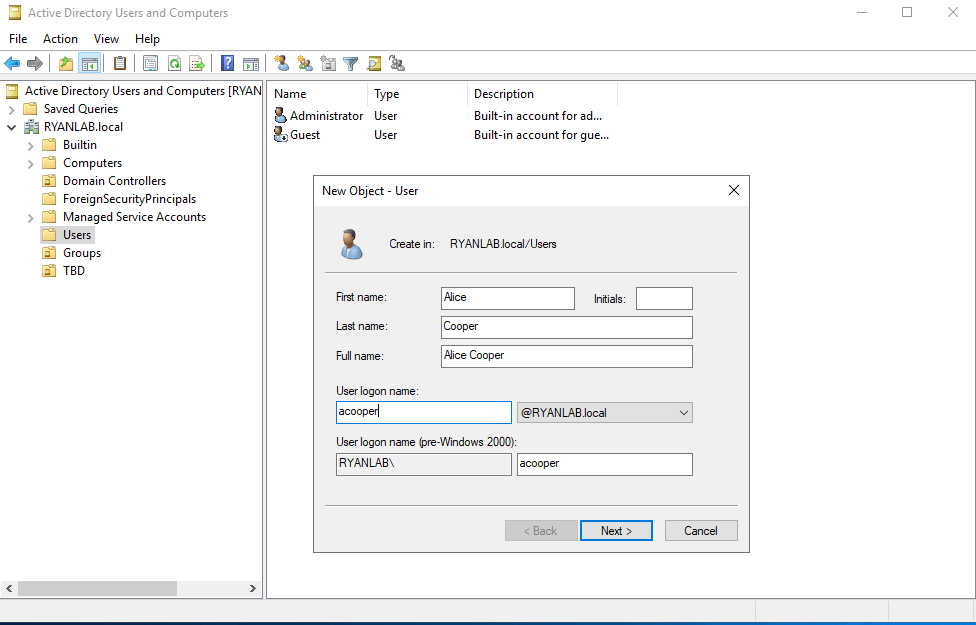
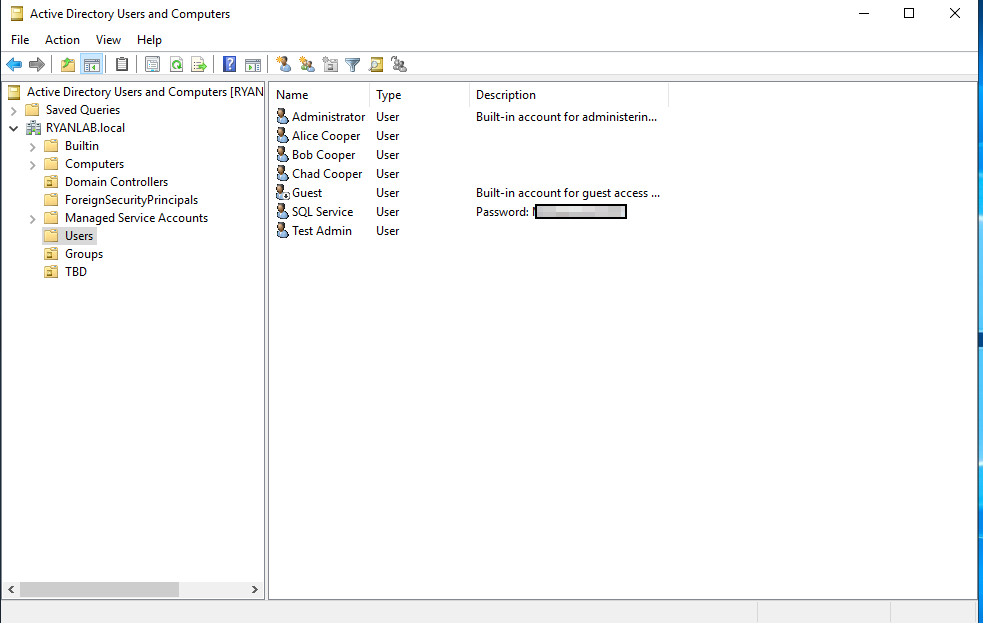
Time to create some new users. Inside of our Users OU, we can right click in the white space and select New > User. In my example, I created Alice Cooper, Bob Cooper, and Chad Cooper and set passwords for each of them. In the real world, you should make sure to force the user to change their password upon next login and make sure that your organization has strong password policies in place. I also created a test administrator account and a service account (with the password in plaintext in the description) since this is my penetration testing environment as well. Again, do not do this in the real world.
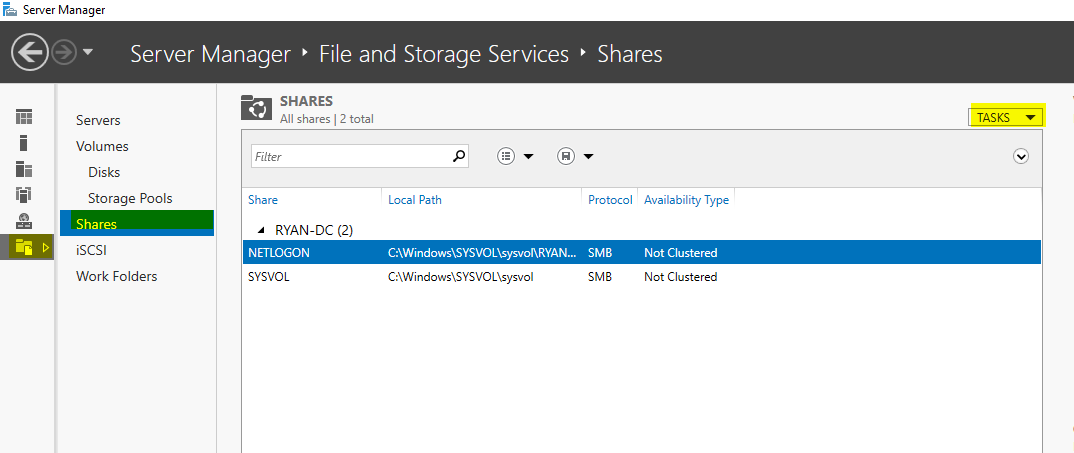
For all of my help desk and desktop support people, becoming familiar with Active Directory Users and Computers will be important. This is where you will be resetting passwords and potentially managing groups. Now it's time to get some file shares going. Back inside of Server Manager, click on File and Storage Services on the left, click on Shares, and in the top right, click Tasks and select New Share.
Select Profile: SMB Share - Quick
Share Location: RYAN-DC (or whatever your domain is called)
Share Name: hackable (again for my hacking lab)
Other Settings: click Next
Permissions: click Next (using defaults)
Confirmation: Create
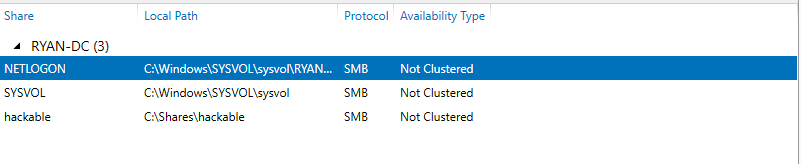
Now, I'm following along to Heath Adams' walkthrough of setting up some Active Directory attacks, so if you aren't interested in penetration testing then feel free to stop here and skip to the next header where we join our Windows 10 PCs to the domain. In order for some of the attacks to work against the SQLService that was set up earlier, we have to set the Service Principle Name. I'm still learning too, so more information can be found here: https://docs.microsoft.com/en-us/windows/win32/ad/service-principal-names
If you're still following along, open up a command prompt as Administrator. In brackets, replace the text with what your Domain Controller name is as well as your Domain name.
setspn -a [DOMAIN CONTROLLER NAME]/SQLService.[DOMAIN NAME]:55000 [DOMAIN NAME]\SQLService
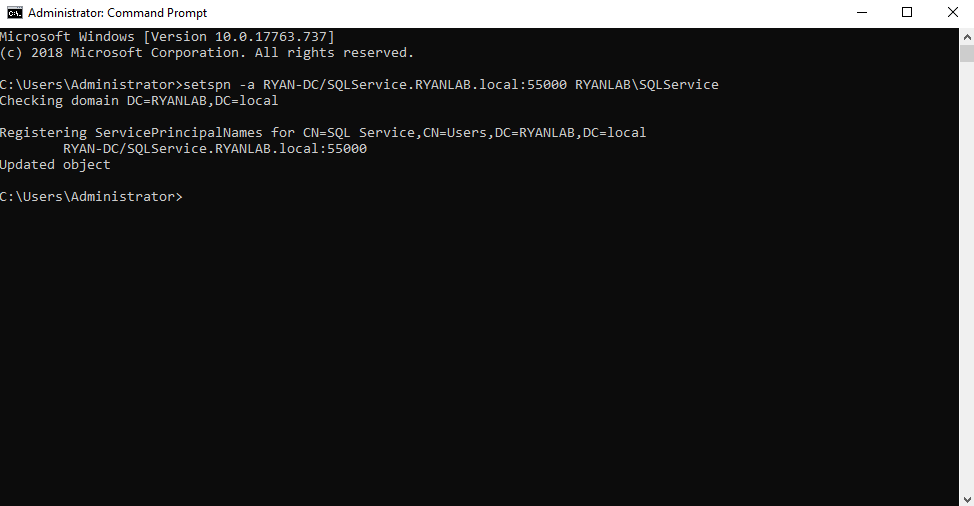
Now the next command to verify it was successful:
setspn -T [DOMAIN NAME] -Q */*
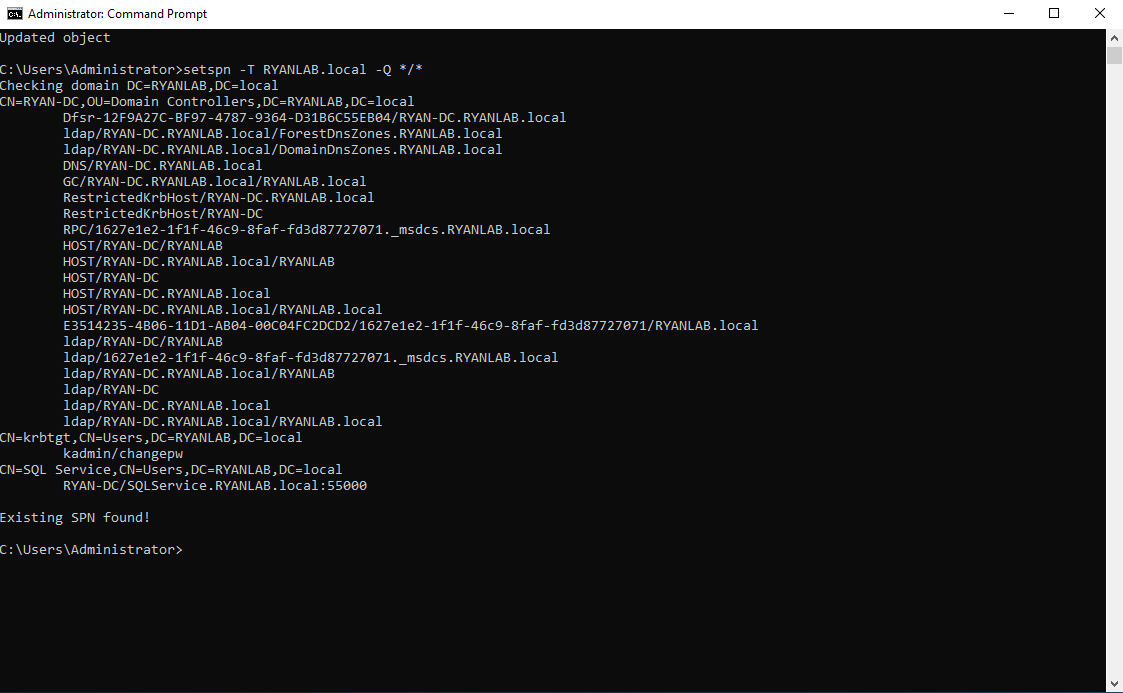
Let's set up some group policy now. On your desktop, search for Group Policy Management and right click to open as an Administrator. Once you drop the menus down to find your domain, right click it and select "Create a GPO in this domain". We're going to name it "Disable Windows Defender" so that we don't have to go through the trouble of obfuscating our payloads in the future.
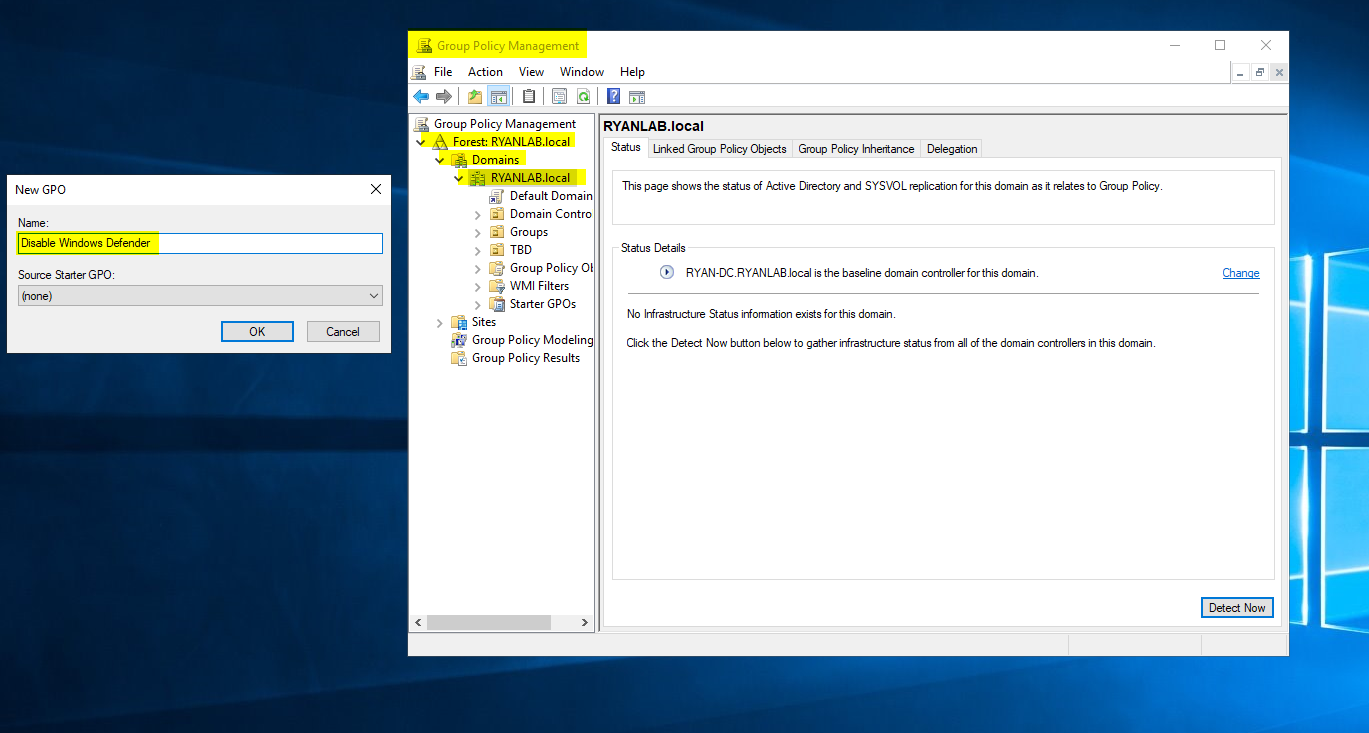
Now that we have the Group Policy Object (GPO) in place, let's right click on it and select edit. Now we're going to play the dropdown game and click on Computer Configuration > Policies > Administrative Templates > Windows Components > Windows Defender Antivirus. From here, double click on "Turn off Windows Defender Antivirus" and click on Enable, then click Apply and OK. You can see in the third screenshot that the rule is now applied.
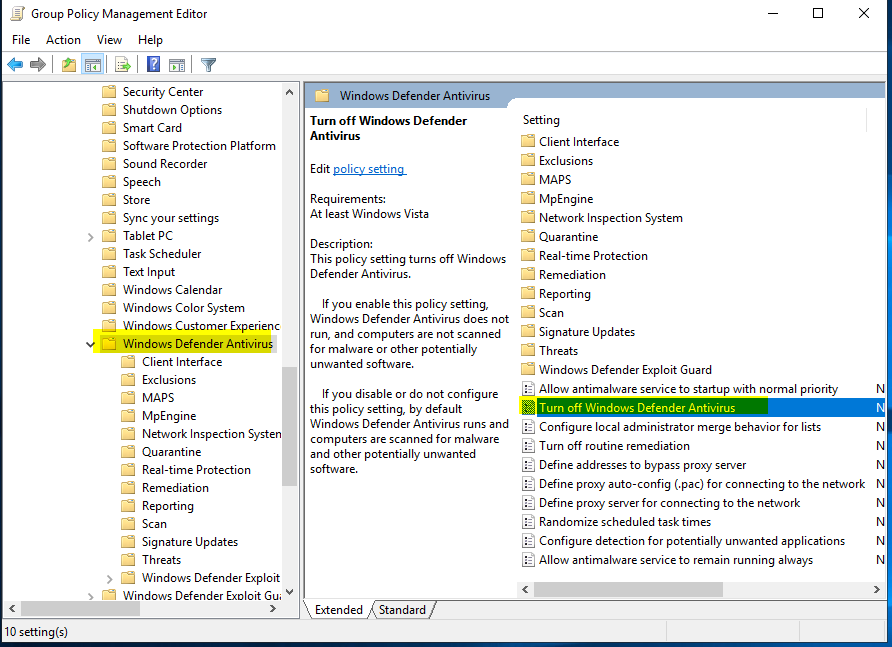
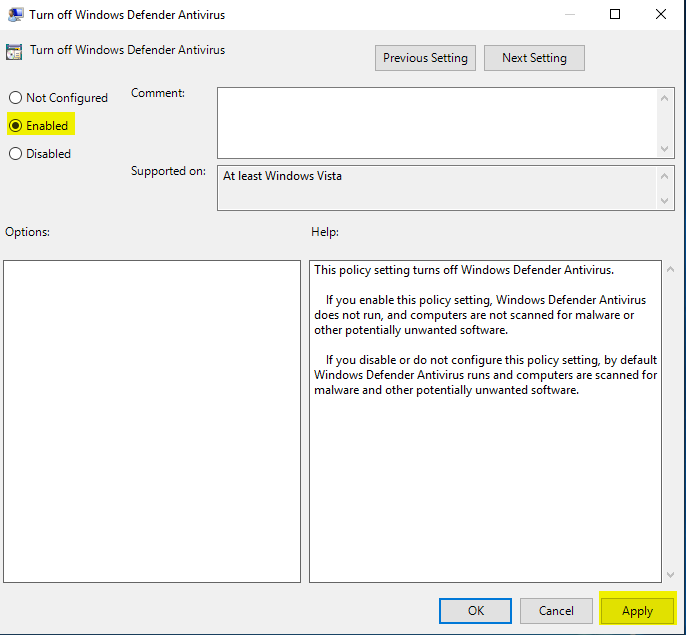

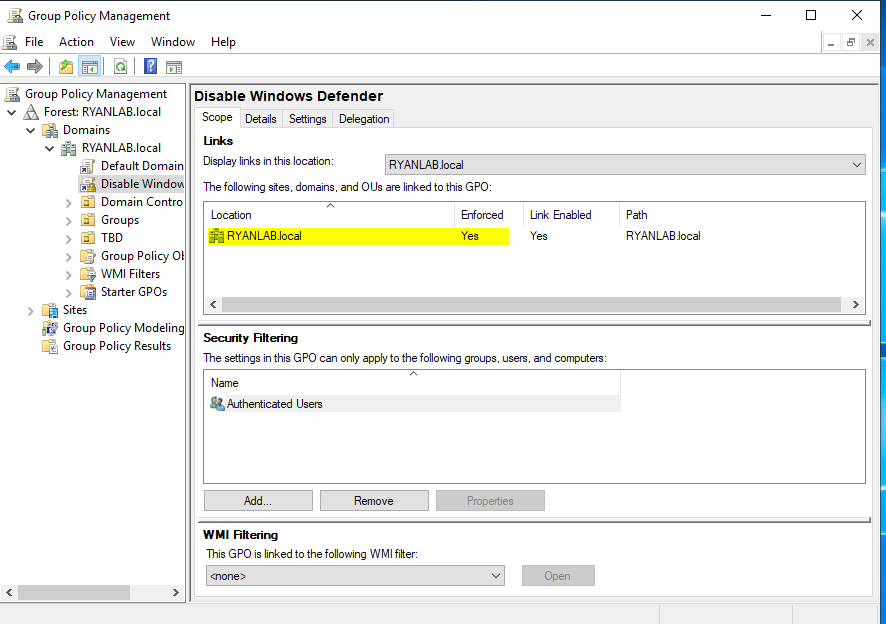
One last thing is to make sure this policy is set to Enforced. You can switch back to the Group Policy Management tab, and right click on your domain name to select Enforced.
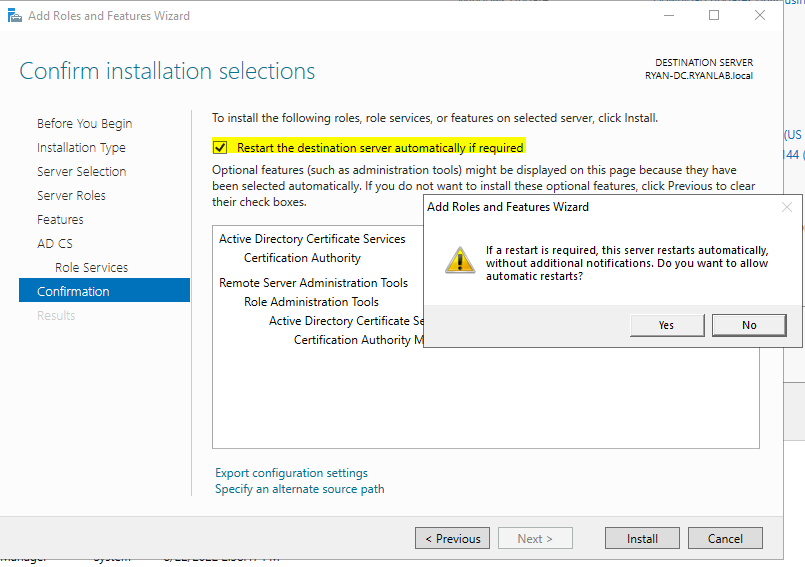
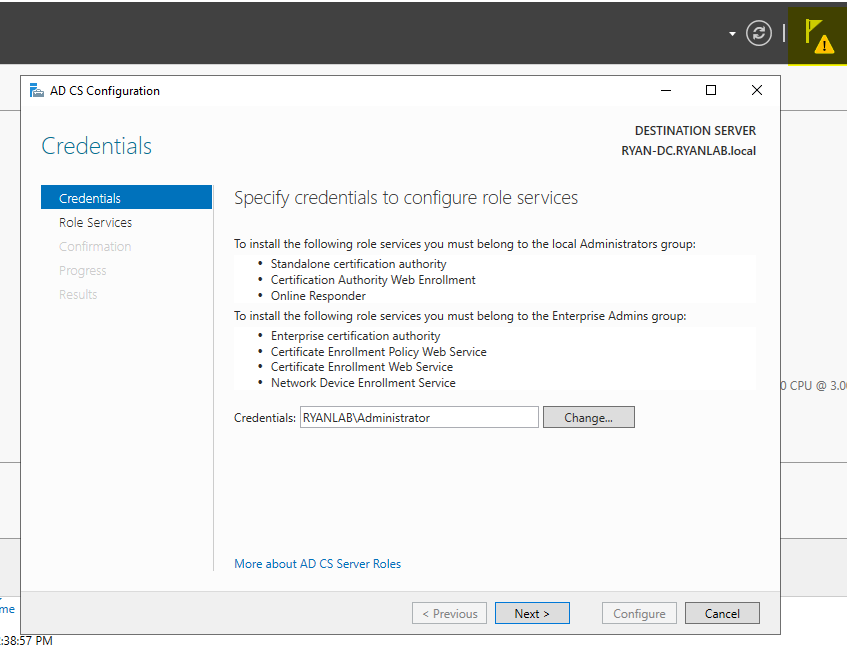
Before we get into connecting the other Windows 10 machines to the domain, let's add a certificate to the domain. Under Server Manager, click on Manage > Add Roles & Features, and click next until you get to the Server Roles page. From here, select the Active Directory Certificate Services feature, and click next until you get to the confirmation page. Make sure to select the checkbox to restart the destination server if required. Once installed, click the notification box at the top and click Configure Active Directory Certificate Services. From here, click next until you get to Role Services. Select the "Certification Authority" box and click next. Keep clicking next until you get to the Validity Period. Change this from 5 years to something like 99 years. Click next, next, next, and finally configure. Go ahead and reboot the server, and then we're onto connecting our Windows 10 machines.
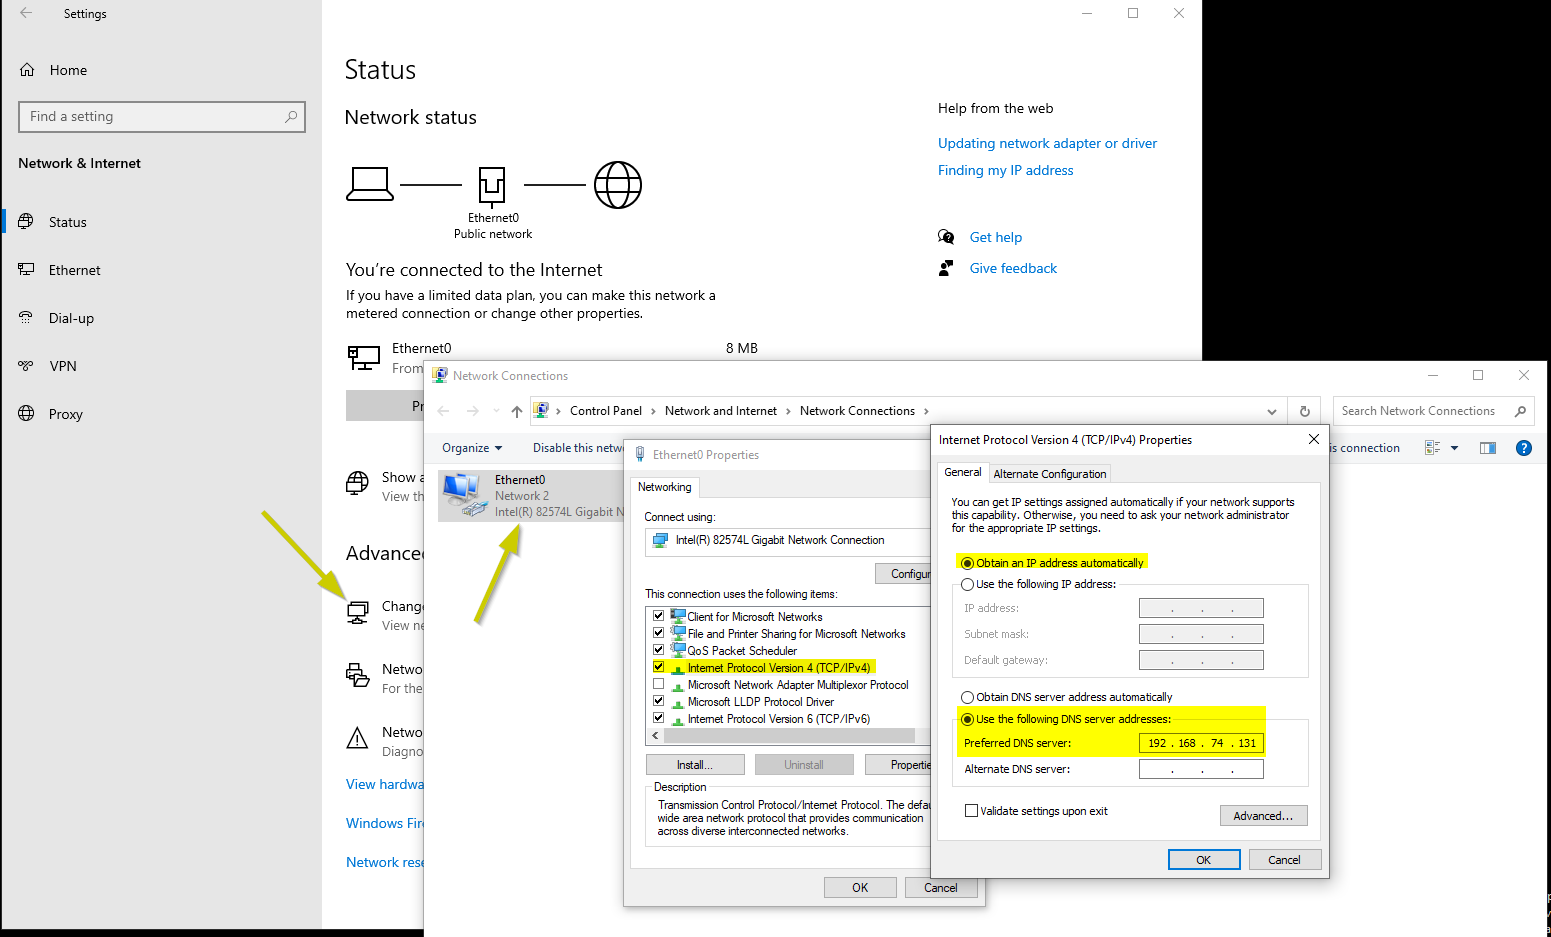
Let's grab the IP address from our Domain Controller and note it down. In my case, it was 192.168.74.131. Let's go to our Windows 10 machine and configure TCP/IPv4 settings to make sure we set our DNS server as the IP address of our Domain Controller.
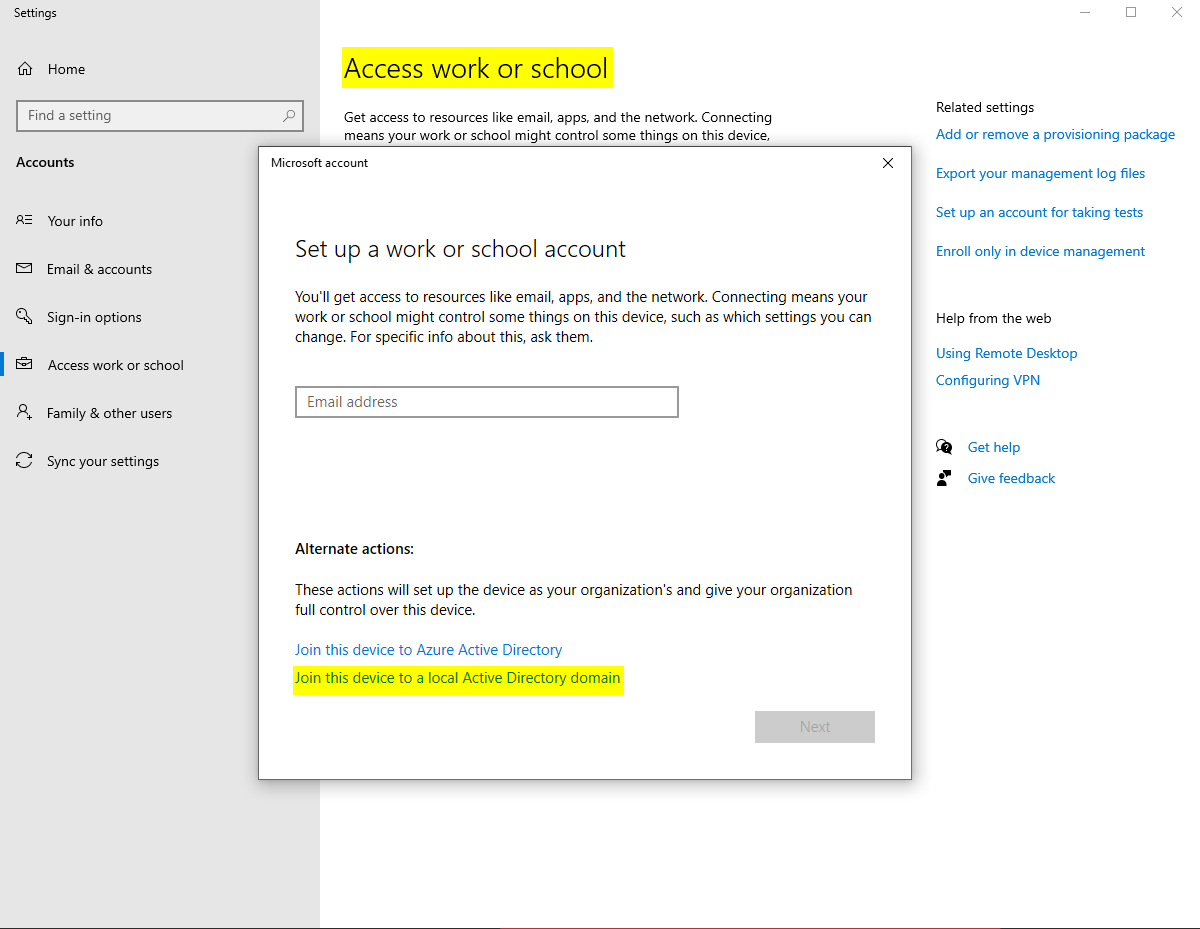
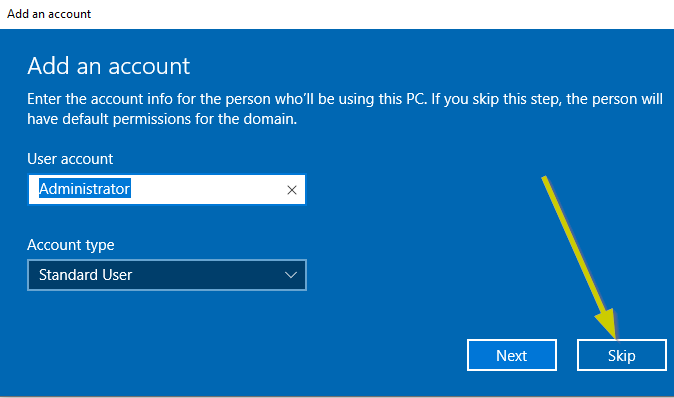
In the search field on the desktop, type "access work or school" to bring up the feature to join the domain. Click on the Connect button and choose "Join to a local Active Directory domain". Type in your domain name (in my case, RYANLAB.local) and login with the Administrator account. Go ahead and skip the next prompt and restart the computer.
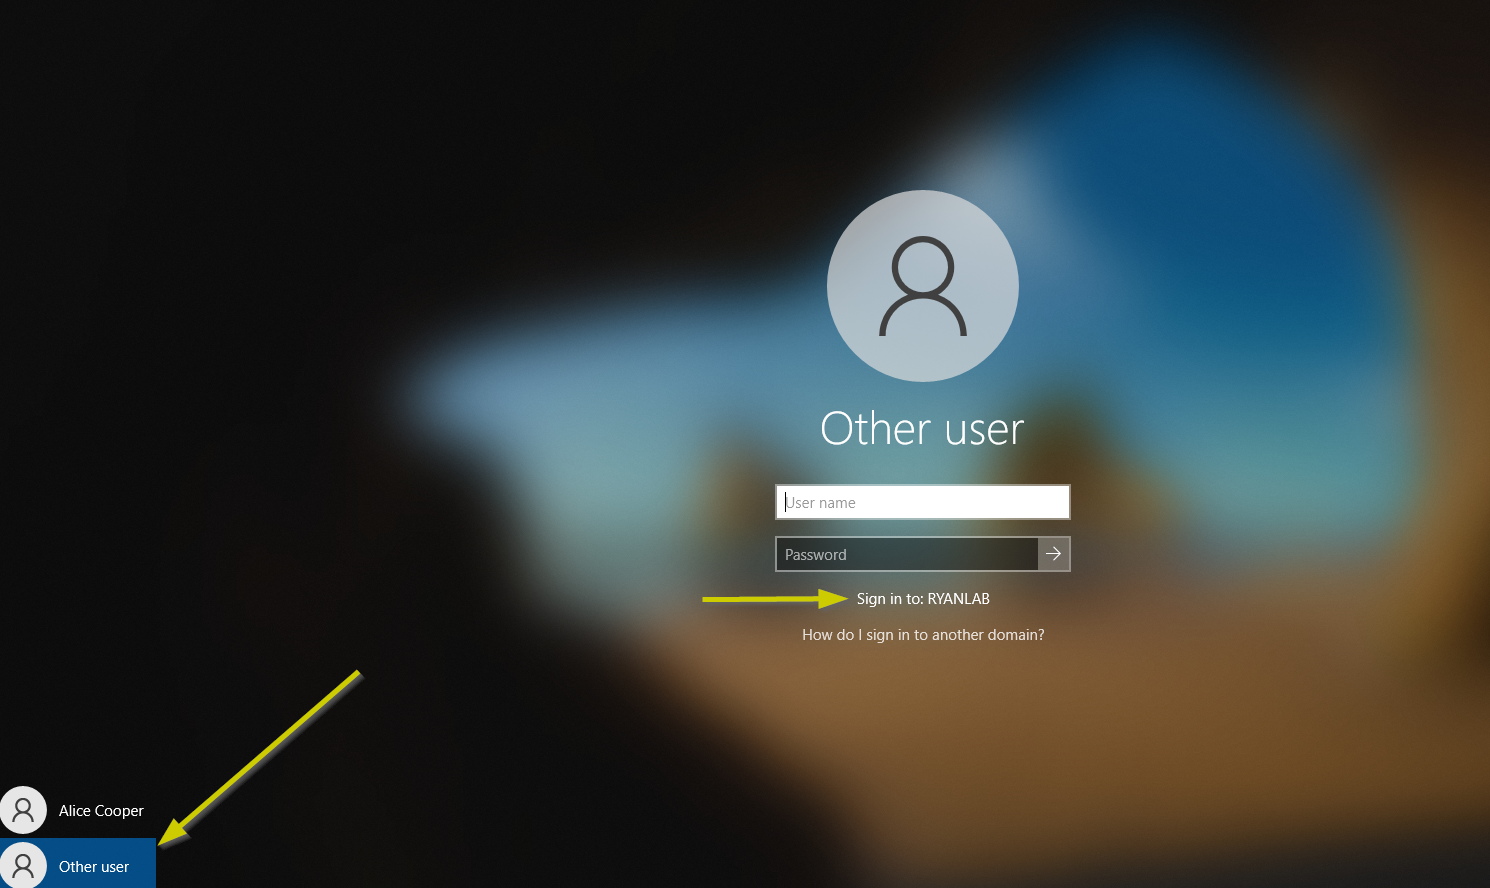
Now when we reboot, rather than logging into the machine as the local user, we're going to select Other User. You'll see now you're signing into the domain. Rather than logging in as Alice Cooper, I'm going to use the username and password I created inside of Active Directory Users and Groups (acooper).
So again - we are going to configure these machines as part of a hacking lab. Feel free to skip over these next bits if you don't want to do the L337 H4x0r stuff. If you do, carry on.
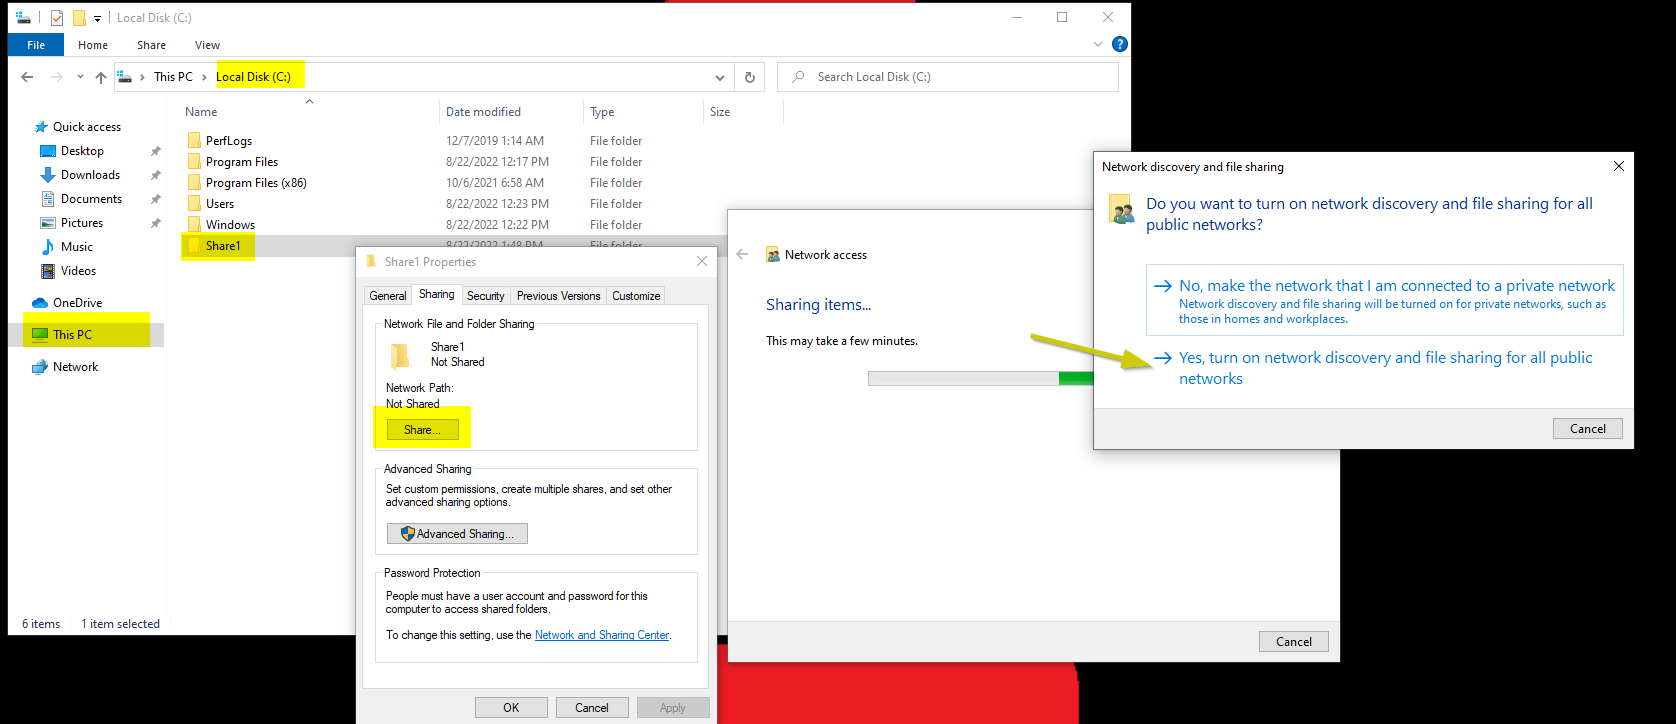
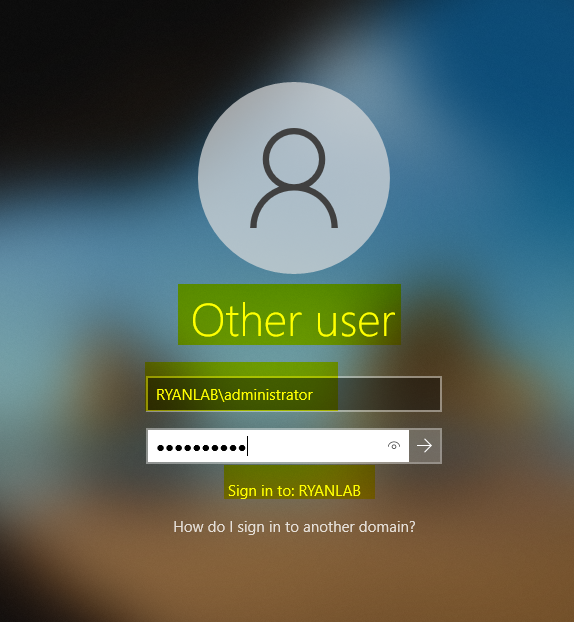
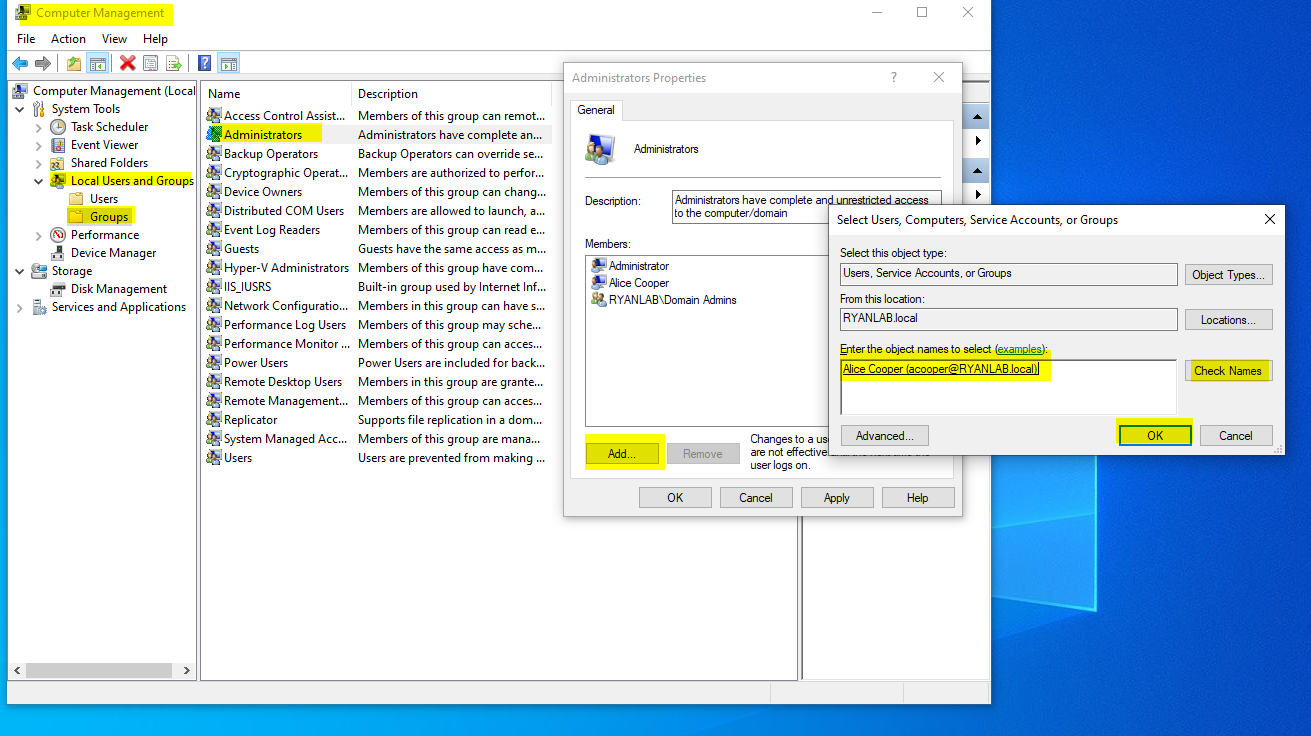
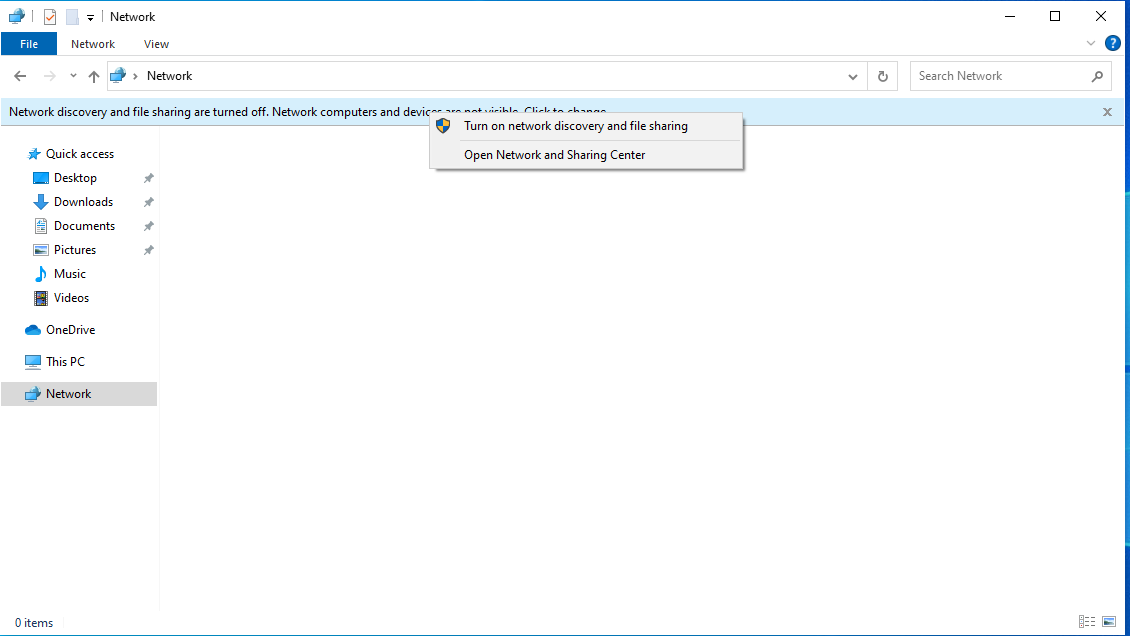
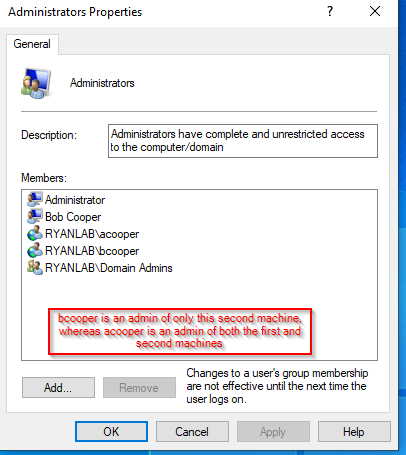
So now we're going to make acooper a local administrator of the first Win10 machine (RYANLAB1) and a local administrator of the second Win10 machine (RYANLAB2). So log off and log into the first Win10 machine as an administrator of the domain (note the RYANLAB\administrator as the username, otherwise you're not signing in as the domain administrator). Once signed in, open up Computer Management > Local Users and Groups > Groups > and double click on Administrators. From there, you can type in the login name of the user you want to add (acooper). If you hit Check Names, acooper is the only one so he gets added, otherwise it will give you a list of names to select. Click Apply and OK. Before we go, let's make sure that network discovery is enabled. Open up File Explorer, click on Network, and right click the banner message to turn on network discovery and file sharing. Make sure to do all of the same on the second Win10 machine. Also on that second Win10 machine, let's set up bcooper as an administrator of just that second machine as well.
That's it! We were able to successfully set up a Domain Controller, join two computers to the domain, create a few new users, manage Group Policy Objects, and configure a SOHO environment. If you followed all of these steps, you now have an Active Directory environment to practice Help Desk/Desktop Support skills or penetration testing skills.